
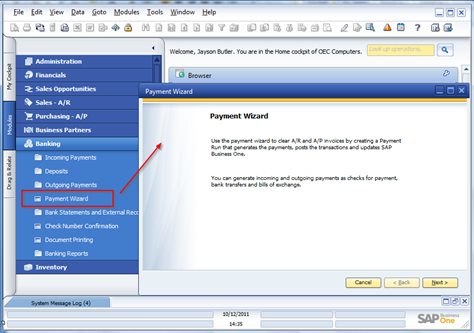
- In the main menu, click on Banking > Payment Wizard. Click the Next button.
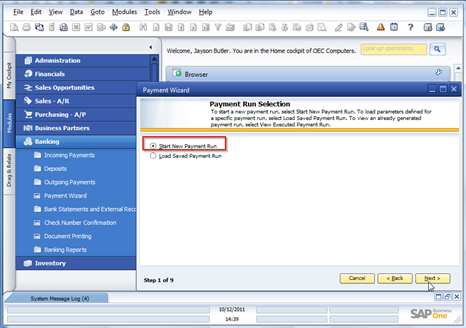
- Select Start new Payment Run and press Next button. Press the Next button.
- Fill in the following information:
Payment Run Name: Automatically defined, unique code, which you can change if required.
Posting Date: Specify the posting date of incoming/outgoing payments to be created by the payment run.
Payment Type: Choose Outgoing for all open A/P invoices matching your previous selection.
Payment Means: Choose Check.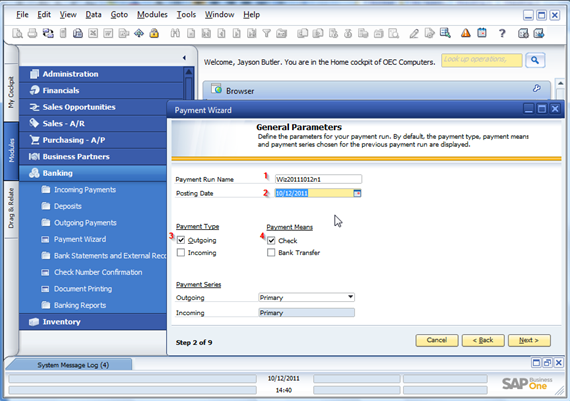
- Press Next to continue.
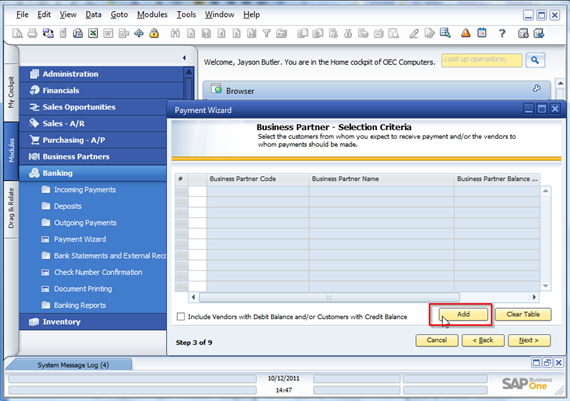
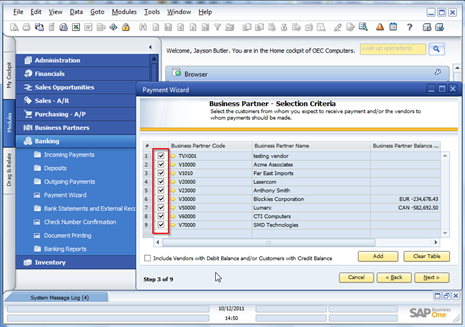
- Click the Add button to choose vendors.
- In the BP Properties window, either:
Select the vendor Business Partner code range or
Select Vendor Group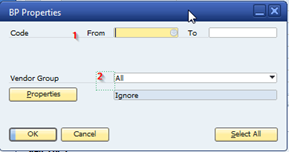
- Mark the vendors that you want to process the payment and print checks for.
- On the Document Parameters screen, select document sort order using the Selection Priority drop-down. Then specify the applicable date ranges:
Posting Date: Specify a posting range to include A/P Invoices or manual Journal Entries whose posting date is within this range.
Due Date: Specify a due date to include A/P Invoices or manual Journal Entries whose due date is within this range.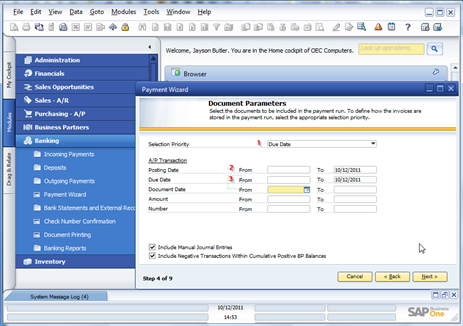
- Click Next.
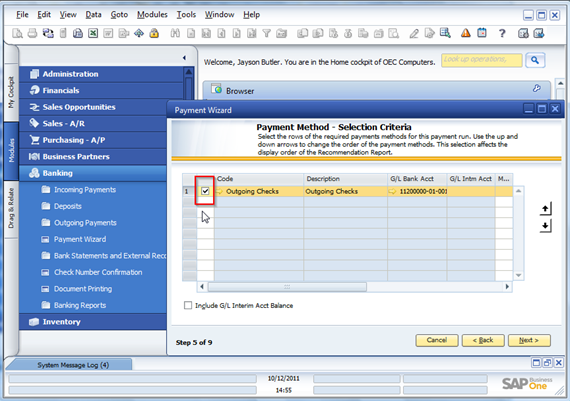
- Choose the payment method and click the Next button.
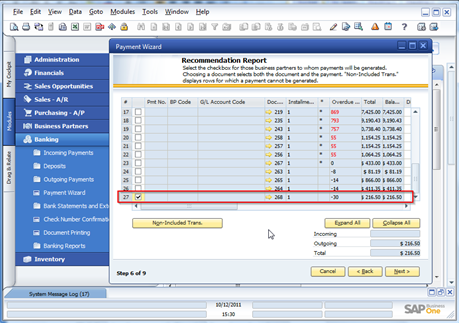
- Click the triangle to expand all invoices for the selected vendor.
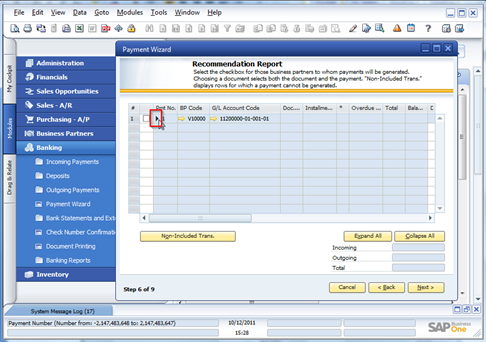
- Mark the invoice you want to pay.
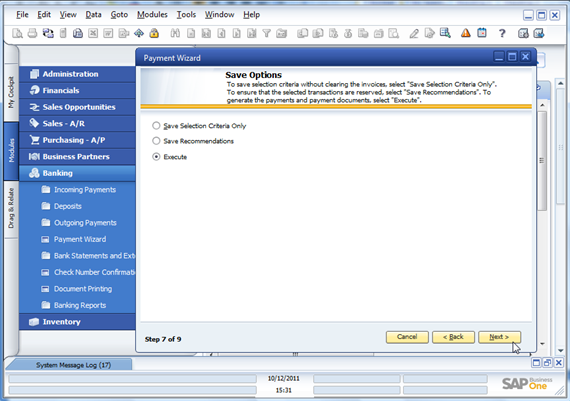
- In the Save Options screen, choose Execute and click Next.
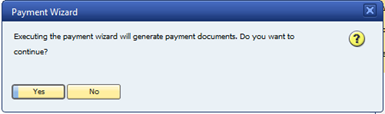
- Click Yes to confirm the generation of payment documents.
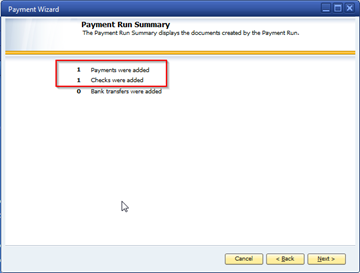
- After the Payment Wizard executes successfully, a summary window will display. Click Next.
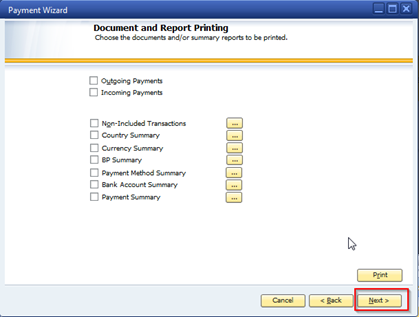
- On the Document and Report Printing screen, simply click Next. Do not make any selections.
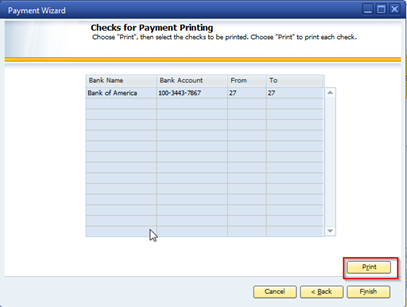
- On the Checks for Payment Printing screen, click the Print button. The system will display the check printing screen. Please follow Method 1 to select the check and finish the printing.
Comments
0 comments
Please sign in to leave a comment.